
Print Ship USA
5/20/2026
The Importance of Print-Ready Files
Before you send your beautiful designs to the printer, ensuring they are properly set up is crucial. A mistake in file preparation can lead to unexpected color shifts, cut-off text, or blurry images. This guide will walk you through the essential steps to prepare your files for professional printing.
1. Understanding Color Modes: RGB vs. CMYK
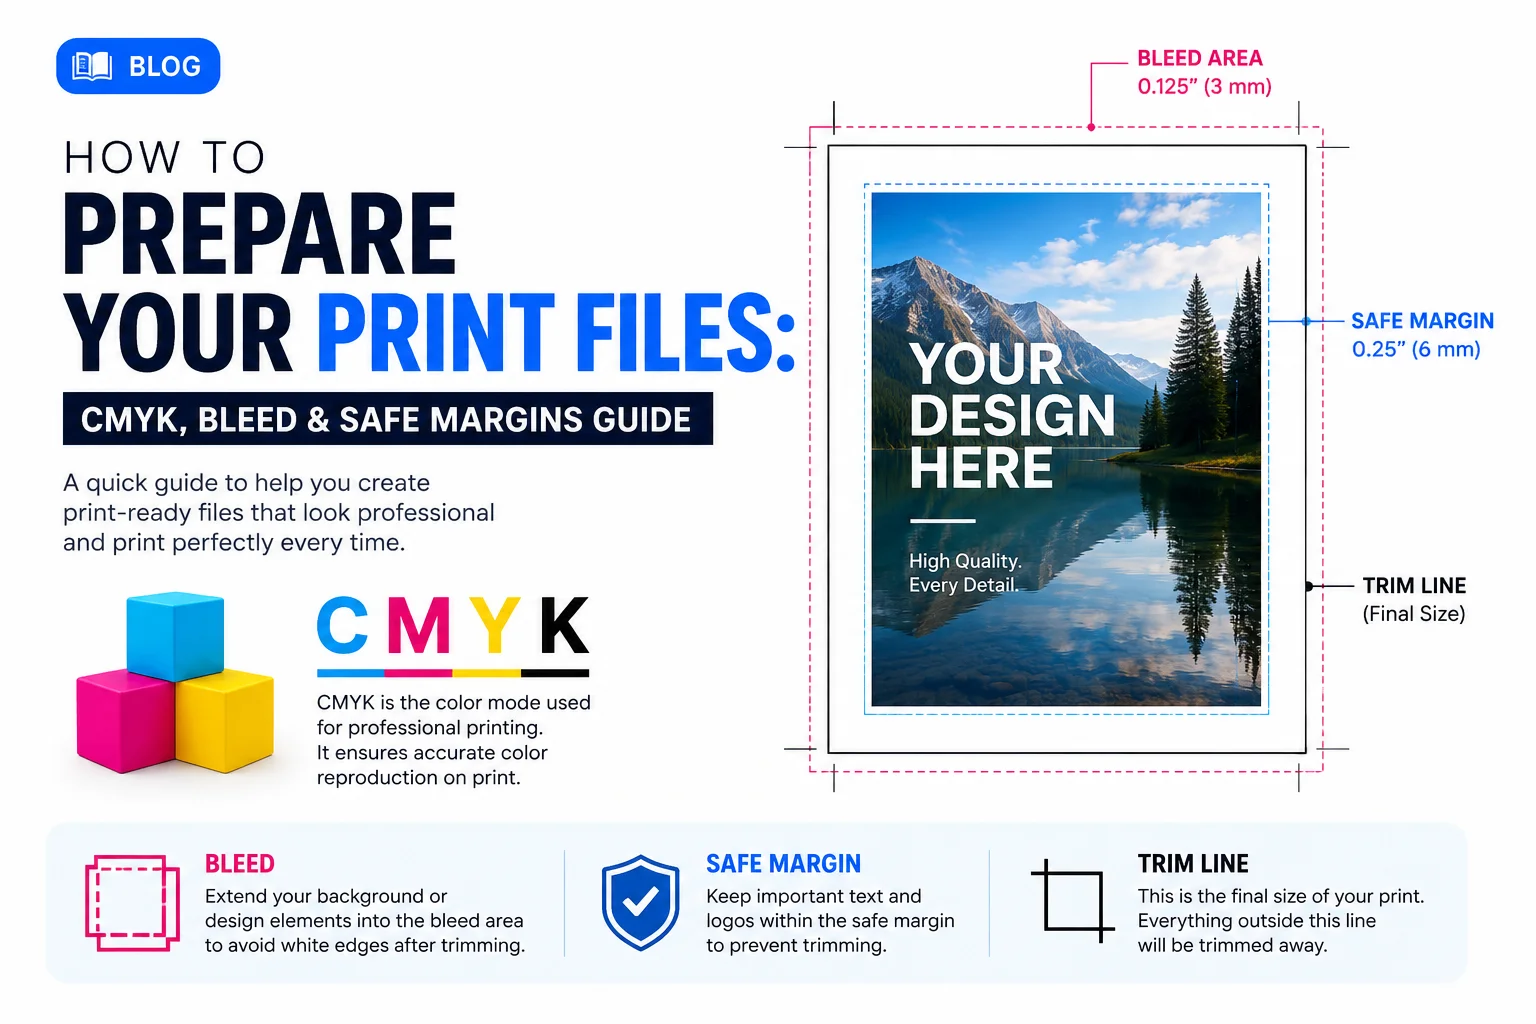
The most common mistake in print design is working in the wrong color mode. Digital screens use RGB (Red, Green, Blue) light to display colors, which allows for a very wide gamut of bright, vibrant colors. However, commercial printing uses CMYK (Cyan, Magenta, Yellow, Key/Black) ink.
CMYK has a smaller color gamut than RGB. If you design in RGB and print in CMYK, some bright colors (especially vibrant blues, greens, and oranges) may look dull or muddy. Always start your design in CMYK mode, or convert your RGB design to CMYK and adjust the colors before finalizing your file.
2. Resolution: The 300 DPI Rule
For crisp, clear prints, your file must have a high resolution. The industry standard for printing is 300 DPI (dots per inch) at the final print size.
Images pulled from the web are typically 72 DPI. If you try to print a 72 DPI image, it will appear pixelated and blurry. Always use high-resolution images. Vector graphics (like those created in Adobe Illustrator) are resolution-independent and will always print sharply.
3. Bleed: Extending Beyond the Edge
When printing goes all the way to the edge of the paper, you need to include a "bleed". Printing equipment cannot always print exactly to the edge, and cutting machines have a slight margin of error (usually around 1/16 to 1/8 of an inch).
To avoid unseemly white borders around your printed piece, you must extend your background color or image beyond the actual cut line. A standard bleed is 0.125 inches (1/8") on all sides. For example, if your final business card size is 3.5" x 2", your file size with bleed should be 3.75" x 2.25".
4. Safe Margins: Protecting Your Content
Just as you need a bleed on the outside, you need a safe margin on the inside. Because cutting machines can shift slightly, any important text or logos placed too close to the edge might get trimmed off.
We recommend keeping all critical elements at least 0.125" to 0.25" away from the final trim edge. This ensures your content remains intact and your design looks balanced and professional.
5. Exporting Your File
The preferred file format for most commercial printers is a high-resolution PDF. When exporting your PDF, ensure that you include crop marks (to show where to cut) and that your bleed settings are active.
Also, remember to outline your fonts. This converts the text into vector shapes, ensuring that the printer doesn't need to have your specific fonts installed to print your file correctly.